Backpacking Checklist for Beginners: What to Pack
A beginner-friendly backpacking checklist that turns the Ten Essentials, sleep system, food, water, permits, and weather planning into a packable first-trip workflow.
June 16, 2026 / 13 min read
TLDR
- For a first backpacking trip, start with an easy one-night route, known water, a legal campsite, and a weather window you can comfortably handle.
- Pack the core systems first: backpack, shelter, sleep system, food, water treatment, clothing layers, navigation, light, first aid, emergency shelter, and repair items.
- Check permits, local food-storage rules, fire restrictions, weather, and trailhead access before buying or borrowing extra gear.
- Keep daytime essentials easy to reach, keep your sleep system dry, and test-pack everything before the trailhead.
- After the trip, save what worked, what stayed unused, and what you would change so the next packing list gets simpler.
Start with the trip, not the gear aisle
A beginner backpacking checklist should begin with the trip you are actually taking. A warm one-night forest loop with reliable water is a different packing problem than a high desert route, an exposed alpine pass, or a shoulder-season trip where the trailhead may still be snowy. The right list is not the longest list. It is the smallest complete kit that covers the route, weather, rules, water, food, sleep, and reasonable emergencies.
For a first trip, choose simple conditions on purpose. Look for a short route, modest elevation gain, a familiar trailhead, a legal overnight site, and a forecast that does not require advanced storm, heat, snow, or navigation judgment. Short does not mean boring. It means you leave enough energy to learn how your pack rides, how long camp setup takes, how your stove works, and what you actually use after dark.
This guide is written for beginners packing for an overnight backpacking trip, not an ultralight thru-hike or a luxury campout. Use it as a planning workflow: confirm the rules, build the core systems, organize the pack, then record what you learned so your next trip is easier.
The beginner backpacking checklist
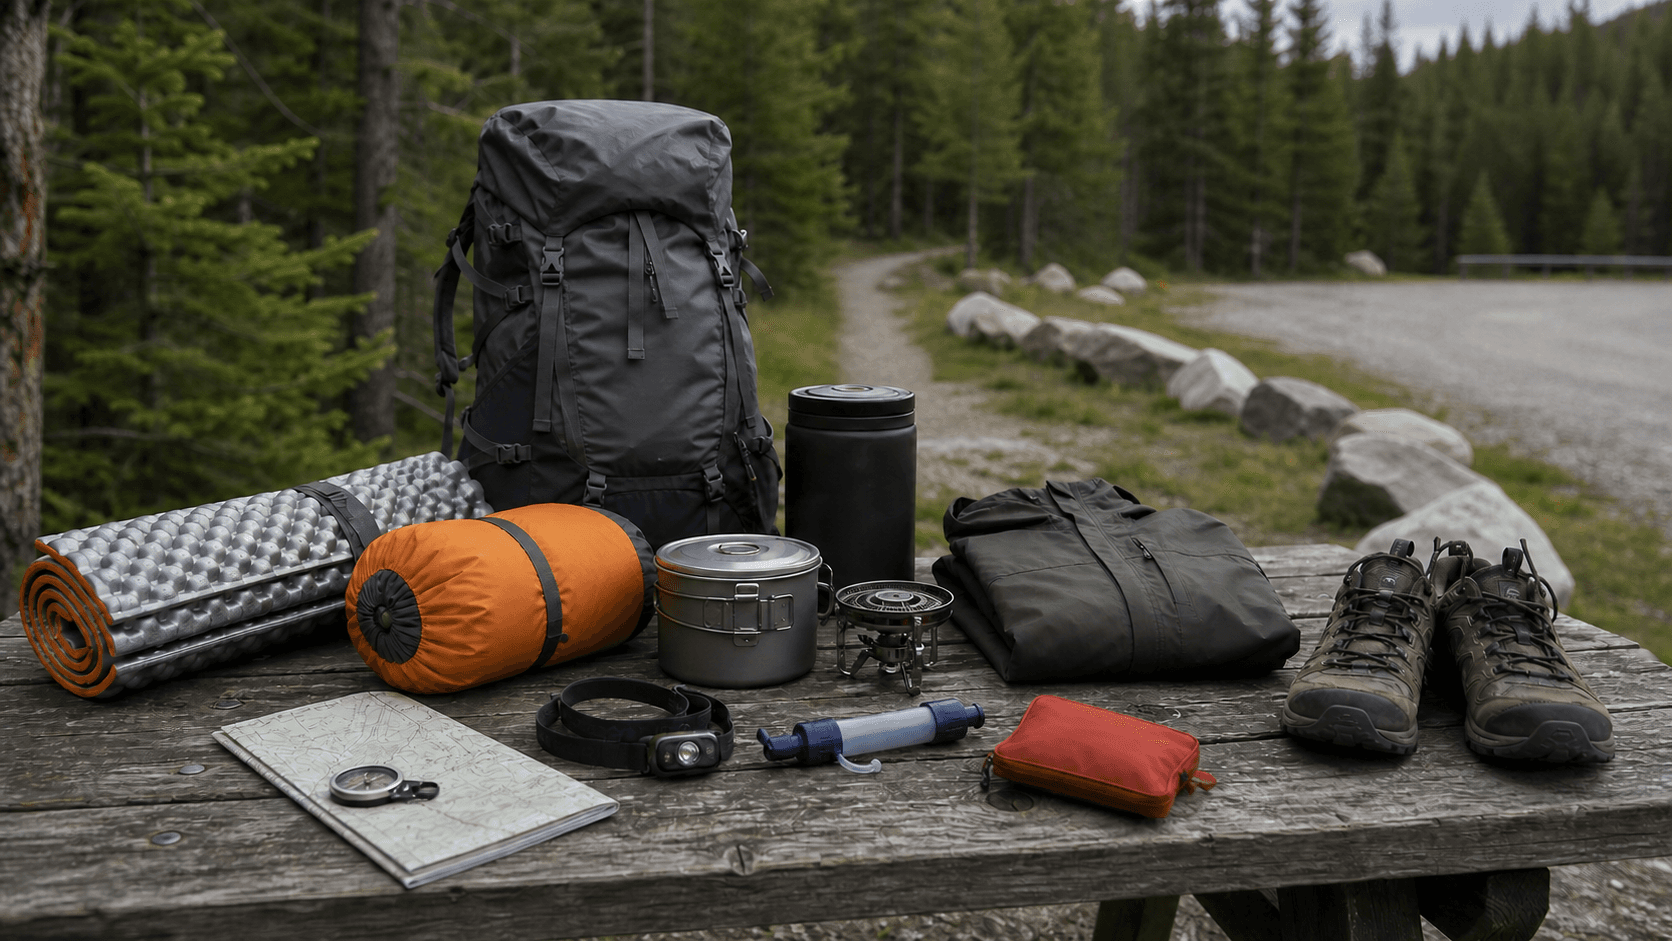
Use this as the high-level checklist before you get into brand names or ounce counting. You need a comfortable backpack; shelter such as a tent, tarp, or hammock system that fits the area; a sleeping bag or quilt warm enough for the expected low; a sleeping pad; packed clothing layers; rain protection; hiking shoes or boots; food; stove and fuel if cooking; water bottles or reservoir; water treatment; navigation; headlamp; first-aid kit; sun protection; knife or repair tool; fire starter where legal and appropriate; emergency shelter or bivy; toilet kit; trash bag; permits; ID; payment method; and a way to communicate or self-rescue that fits the remoteness of the route.
The National Park Service Ten Essentials are useful because they are categories, not a shopping list. Navigation, sun protection, insulation, illumination, first aid, fire, repair, nutrition, hydration, and emergency shelter all need to be represented in your pack. For backpacking, those categories sit alongside the overnight systems: shelter, sleep, food storage, water treatment, and hygiene.
Do not pack from memory the night before. Make a trip-specific checklist, lay everything out, and mark which items are borrowed, rented, shared, or already packed. Campora works well for this because the checklist can sit beside route notes, permit links, campsite options, weather screenshots, food plans, and the post-trip notes you will want next time.
Confirm permits, rules, water, and weather
Before you finish packing, confirm that your plan is legal and realistic. Many popular overnight routes require wilderness permits, backcountry campsite reservations, trailhead quotas, parking passes, bear canisters, stove restrictions, group-size limits, or special seasonal rules. These rules vary by land manager and even by zone inside the same park or forest.
Permits are not just paperwork. They can tell you where you are allowed to sleep, how far you need to camp from water, whether fires are prohibited, whether a bear canister is mandatory, and whether your group size is allowed. If you are new, pick a place where the official page clearly explains the overnight process. If the rule language is confusing, call the ranger station or land-manager office before you go.
Water and weather shape the checklist just as much as permits. Mark the known water sources and carry enough capacity for the dry stretches between them. Check a point forecast close to the route, not just the nearest town. Look at overnight lows, wind, rain, lightning, heat, smoke, and how conditions change with elevation. If thunderstorms are likely and your route crosses exposed ridges, the safest packing decision may be changing the trip.
Save the permit, map, trailhead directions, weather forecast, water notes, and emergency contacts where you can reach them without service. A downloaded plan does not replace judgment, but it prevents a common beginner problem: one person has the important link, and no one else can find it at the trailhead.
Build the shelter and sleep system first
Your overnight comfort starts with shelter, warmth, and dryness. A beginner kit usually includes a tent or other complete shelter, stakes, groundsheet or footprint if needed, sleeping bag or quilt, sleeping pad, pillow or spare clothing used as a pillow, and a dry bag or pack liner to keep the sleep system protected. Do a full setup at home or in a park before the trip so you know which poles, stakes, guylines, and repair parts belong together.
Choose sleep gear for the coldest realistic night, not the daytime high. Mountain valleys, desert basins, river corridors, and exposed ridges can cool down quickly after sunset. If you sleep cold, are borrowing unfamiliar gear, or expect damp weather, give yourself more margin. A pad matters too: it cushions you, but it also insulates you from the ground.
Do not let your first night in the backcountry be the first time you learn your tent footprint is missing, the rainfly clips do not match, your pad leaks, or your bag is too tight. Test the system before you depend on it. Pack the sleep system inside a liner or dry bag, and keep it away from loose stove fuel, wet filters, and unsealed food.
Plan food, water, and cooking as one system
Food, water, and cooking should be planned together. A meal that needs boiling water depends on having enough water, a legal stove, enough fuel, a lighter, a pot, and a safe place to cook. A no-cook meal needs less gear but may need more ready-to-eat calories. Either approach can work for beginners if you decide before leaving home.
Pack more food than your exact meal plan requires, but do not turn fear into a heavy pantry. For a one-night beginner trip, keep food simple: lunch or snacks for the hike in, dinner, breakfast, trail snacks, and an emergency snack you do not plan to eat. Repackage food to reduce bulk and trash, but keep cooking instructions if you need them.
Treat backcountry water unless the land manager explicitly says a source is safe. The CDC notes that boiling is the most reliable way to kill germs, and that filtering followed by disinfection is the next best option when boiling is not practical. Many backpackers carry a filter plus a backup treatment option such as tablets or drops. Know your filter's limits and do not wait until dark to collect all your water.
Food storage is part of the cooking system. In bear country and many high-use wilderness areas, you may need a bear-resistant canister or another approved storage method. Canisters are not only about bears. They also keep smaller animals from learning that campsites mean food. Store food, trash, scented items, and cookware according to the local rule, not according to what worked somewhere else.
Pack clothing for movement, rest, and weather
Backpacking clothing has three jobs: help you move without overheating, keep you warm when you stop, and protect you when weather changes. Beginners often pack too many duplicate hiking clothes and not enough weather margin. You usually do not need clean outfits for every day. You do need layers that still work if wind, rain, cold, sun, insects, or sweat show up.
A simple warm-weather overnight clothing system might include hiking shirt, hiking pants or shorts, underwear, hiking socks, an extra pair of dry socks, insulating layer, rain shell, warm hat or buff, sun hat, and sleep layers that stay dry. Add gloves, warmer insulation, rain pants, base layers, or bug protection when the forecast and route call for them.
Avoid cotton as your only cold or wet layer because it holds moisture and can leave you chilled when you stop moving. Also avoid packing every nice outdoor layer you own. Lay clothes beside the forecast and ask what problem each item solves. If two pieces solve the same problem, choose the one that works better for the actual route.
Pack the backpack so the trail feels better
A good beginner pack is organized around access, balance, compression, and dryness. Keep daytime essentials where you can reach them: map, phone, snacks, water, rain shell, warm layer, sunscreen, headlamp, and first aid. Keep your sleep system dry in the main compartment. Put heavier items close to your back and near the middle of the pack so the load does not pull you backward.
Avoid hanging loose gear from the outside unless the item is meant to ride there. Swinging cups, shoes, and bags catch on brush, change your balance, make noise, and get lost. If your pack is overflowing before food and water go in, pause and remove duplicates before you force it closed.
Fit matters more than beginners expect. Load the pack with the real weight, then adjust the hip belt, shoulder straps, load lifters, and sternum strap. Most of the weight should ride on your hips, with the shoulder straps stabilizing the load. Walk stairs or a short neighborhood loop with the packed bag. Hot spots, bouncing, and shoulder strain are easier to fix at home than two miles from the car.
Do a shakedown before the trailhead
A shakedown is a practice run for your pack. Lay out every item, group it by system, and ask three questions: is it required for safety or rules, does it solve a likely problem on this route, and do I know how to use it? If the answer is no, it may be optional. If the answer is yes but you have never used it, test it now.
Set up the tent. Inflate the pad. Turn on the headlamp. Light the stove where it is safe and legal to do so. Use the water filter. Put the bear canister in the pack. Confirm that the fuel canister fits the stove, the charging cable fits the battery, the permit is downloaded, and the map works offline. Beginners often discover missing stakes, dead batteries, wrong fuel, leaky bladders, and forgotten spoons during this step.
After the shakedown, make a final list of what is packed, what is shared, and what must be grabbed from the fridge or charger in the morning. Shared gear needs names attached. If one person carries the tent body and another carries the poles, both people need to know that before the group splits up.
Use the trip to improve the next checklist
The best beginner backpacking checklist gets better after the trip. When you get home, write down what stayed unused, what you wished you had, what broke, what was hard to find, how much food came back, how much fuel you used, whether your sleep system was warm enough, and what you would change for a colder, wetter, hotter, or longer version of the same route.
Do this while the details are still fresh. A two-minute note can save you from repeating the same mistake next season. Maybe you packed too many clothes but needed warmer gloves. Maybe the water filter was slow. Maybe your pack rubbed because the hip belt was too low. Maybe the campsite was great but the trailhead directions were confusing.
Campora is built around that before, during, and after rhythm: plan the route and checklist before the trip, keep the details handy while you are out, then save the notes and photos that make the next trip easier to plan. Backpacking gets less intimidating when every outing leaves you with a better personal packing list, not just a pile of gear to clean.
Sources
More Campora Guides
View allJuly 21, 2026
How to Store Food While Camping in Bear Country
A beginner-friendly workflow for bear country food storage, scented items, coolers, canisters, lockers, campsite cleanup, and local rules.
July 14, 2026
Types of Camping Knives and What Each One Is For
Learn the main types of camping knives, what each one is best for, and how to choose a safer camp blade for cooking, repairs, and trail use.
June 30, 2026
Camping Food List for Beginners: What to Pack
Build a simple beginner camping food list with easy meals, safe cooler packing, water planning, snacks, cleanup, and wildlife-safe storage.